Integrating BindPlane Into Your Splunk Environment
Part 1 of 3: Connecting The Pieces
Preface
Splunk is a popular logging, and in the case of Splunk Cloud, it is also a metrics platform. The BindPlane Agent can integrate with Splunk; both for incoming telemetry to a Splunk Indexer and outgoing telemetry from a Splunk Forwarder. By integrating in this manner, telemetry not natively supported by Splunk can be sent in, and going the other way, the telemetry can be sent to other platforms.
Prerequisites
- BindPlane OP & a BindPlane Agent (Custom OpenTelemetry Collector)
- Splunk Ecosystem
- Splunk Universal Forwarder (sending data into the BP Agent)
- Splunk Heavy Forwarder (sending data into or accepting data from the BP Agent)
- Splunk Indexer (accepting data from the BP Agent directly or via a Heavy Forwarder)
Plan the Architecture
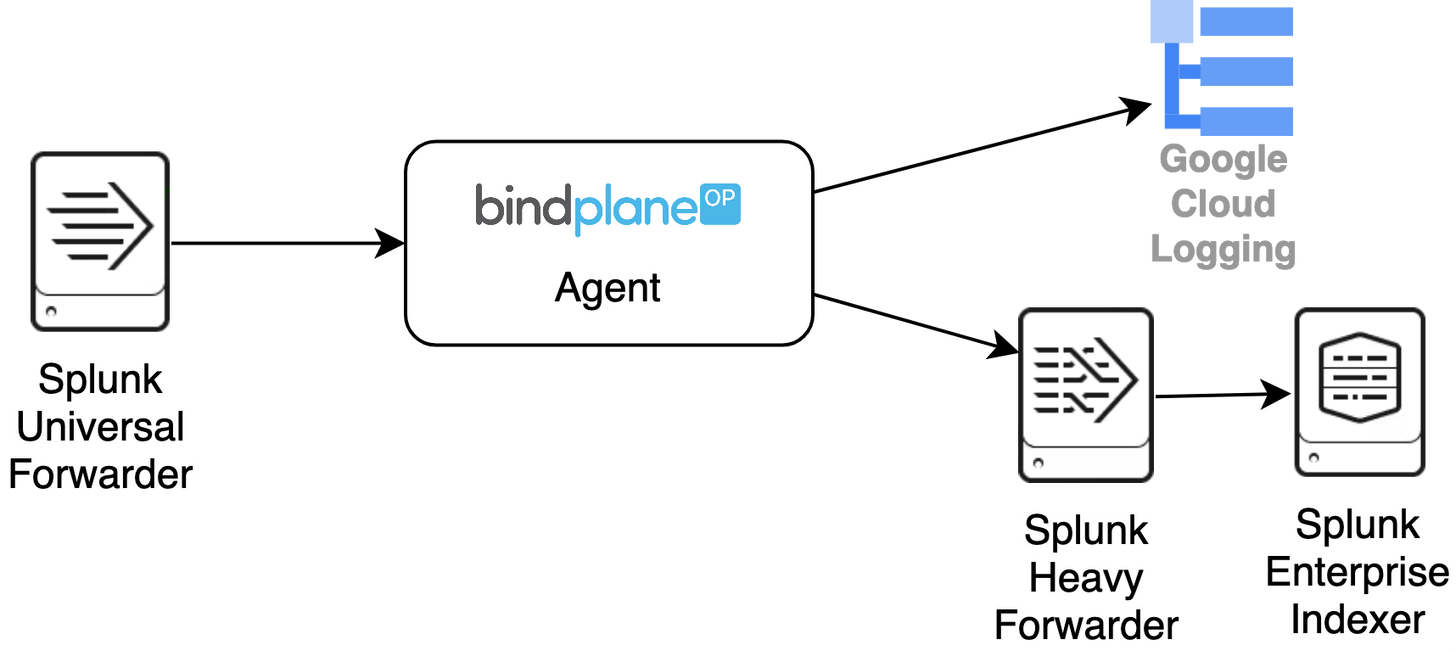
For this blog, I will use a Splunk Universal forwarder to send data to the BindPlane Agent. The Agent will then send that data to a Splunk Heavy Forwarder and Google Cloud Logging. The Splunk Heavy Forwarder then sends the data to the Splunk Indexer.
Configuring the Universal Forwarder
By default, the Splunk Universal Forwarder (UF) sends data over TCP in Splunk’s proprietary Splunk to Splunk (S2S) protocol. To allow the BindPlane Agent to receive data from the UF, it will need to be sent in a raw format instead. This is accomplished by creating a Splunk output configuration stanza that disables the S2S protocol by setting the parameter sendCookedData to false. Add this stanza to the tcpout defaultGroup.
1[tcpout]
2defaultGroup = bindplane
3
4[tcpout:bindplane]
5server = localhost:8779
6compressed = false
7useACK = false
8sendCookedData = falseConfiguring the Heavy Forwarder
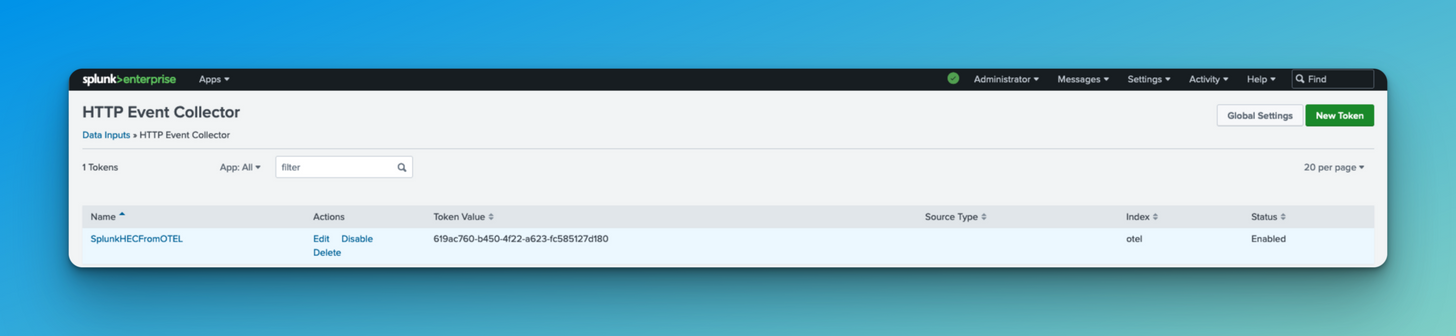
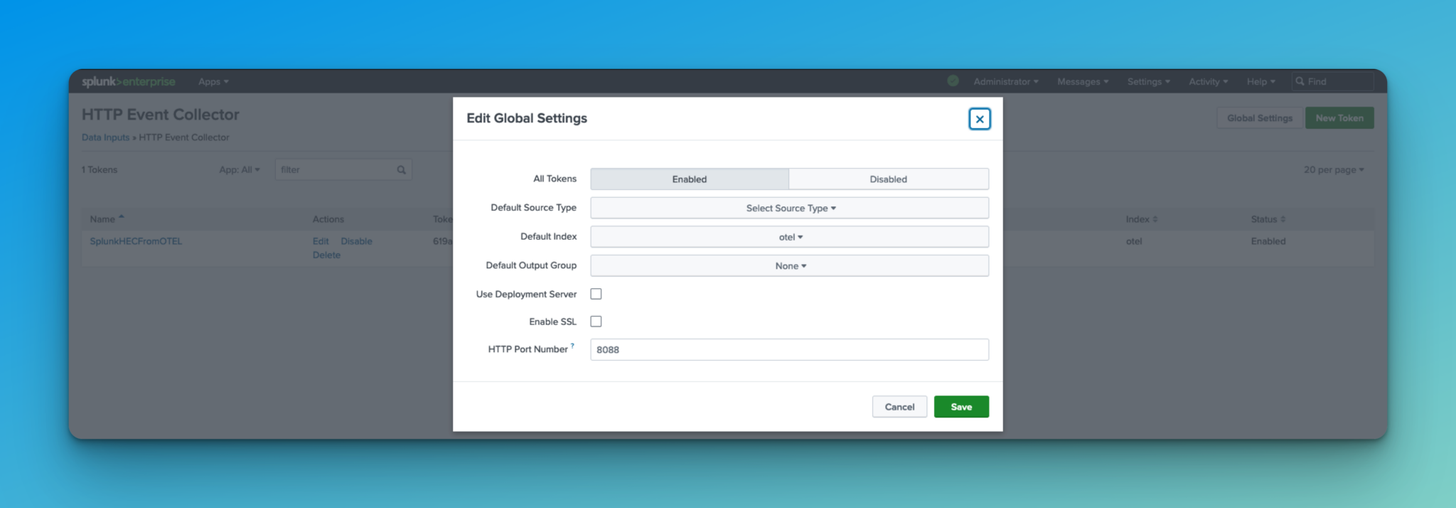
On the Splunk Heavy Forwarder (HF), a Splunk HTTP Event Collector (HEC) data input needs to be created. This is how the BindPlane Agent will send data back into the Splunk ecosystem. Additionally, HEC needs to be enabled under Global Settings. In the screenshots below, there are references to OTEL/otel. This is the BindPlane Agent, which is an OpenTelemetry collector.
BindPlane Configuration
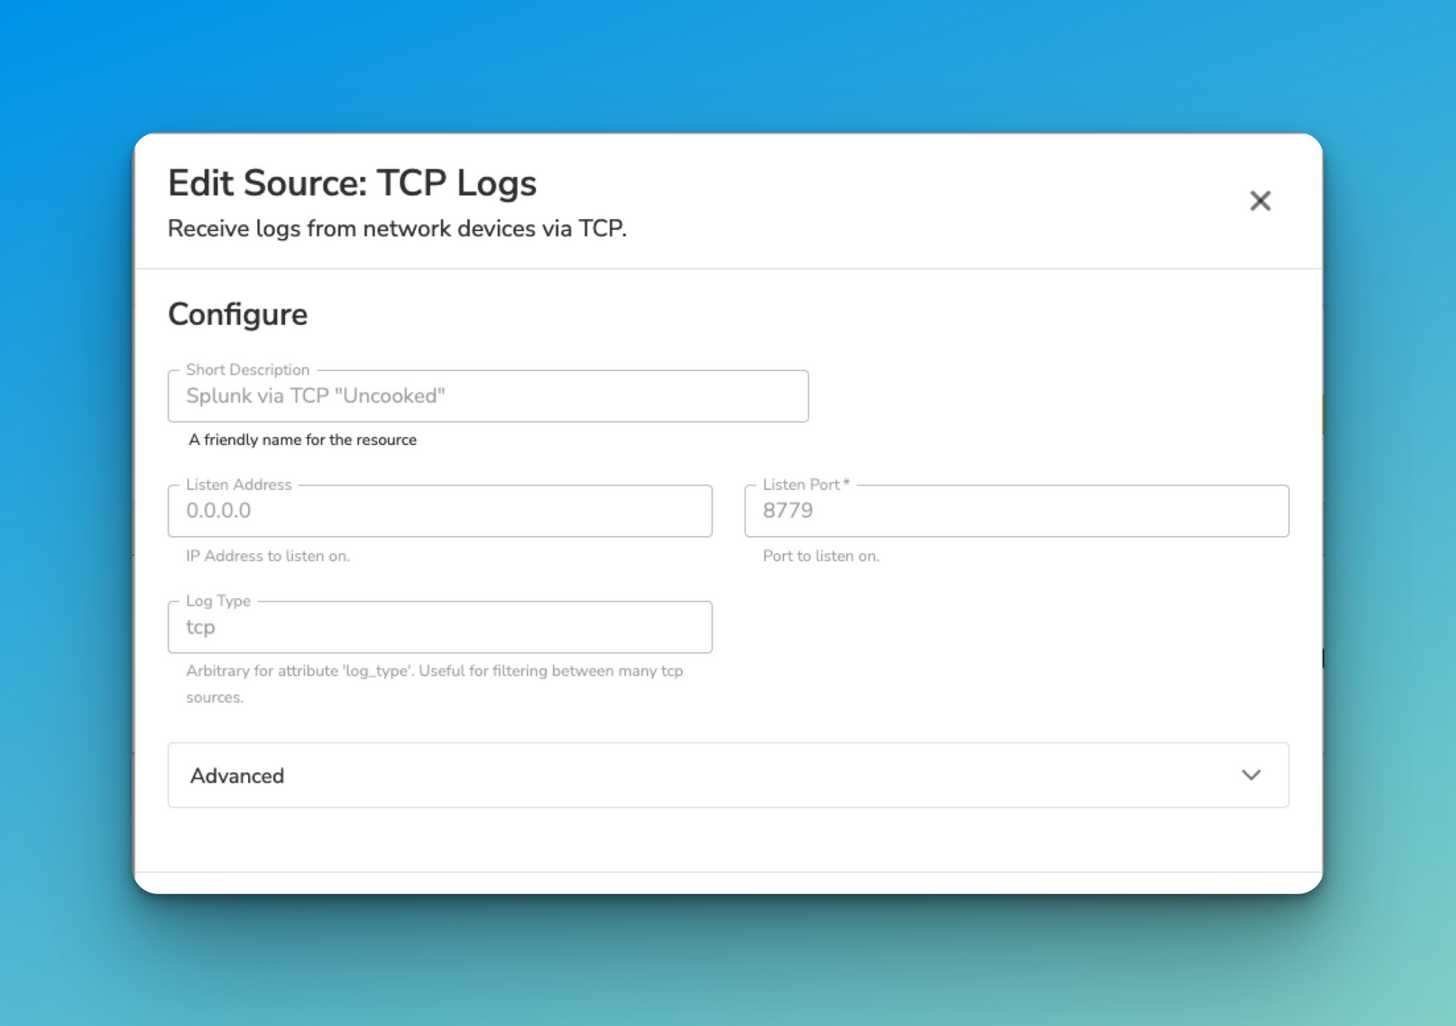
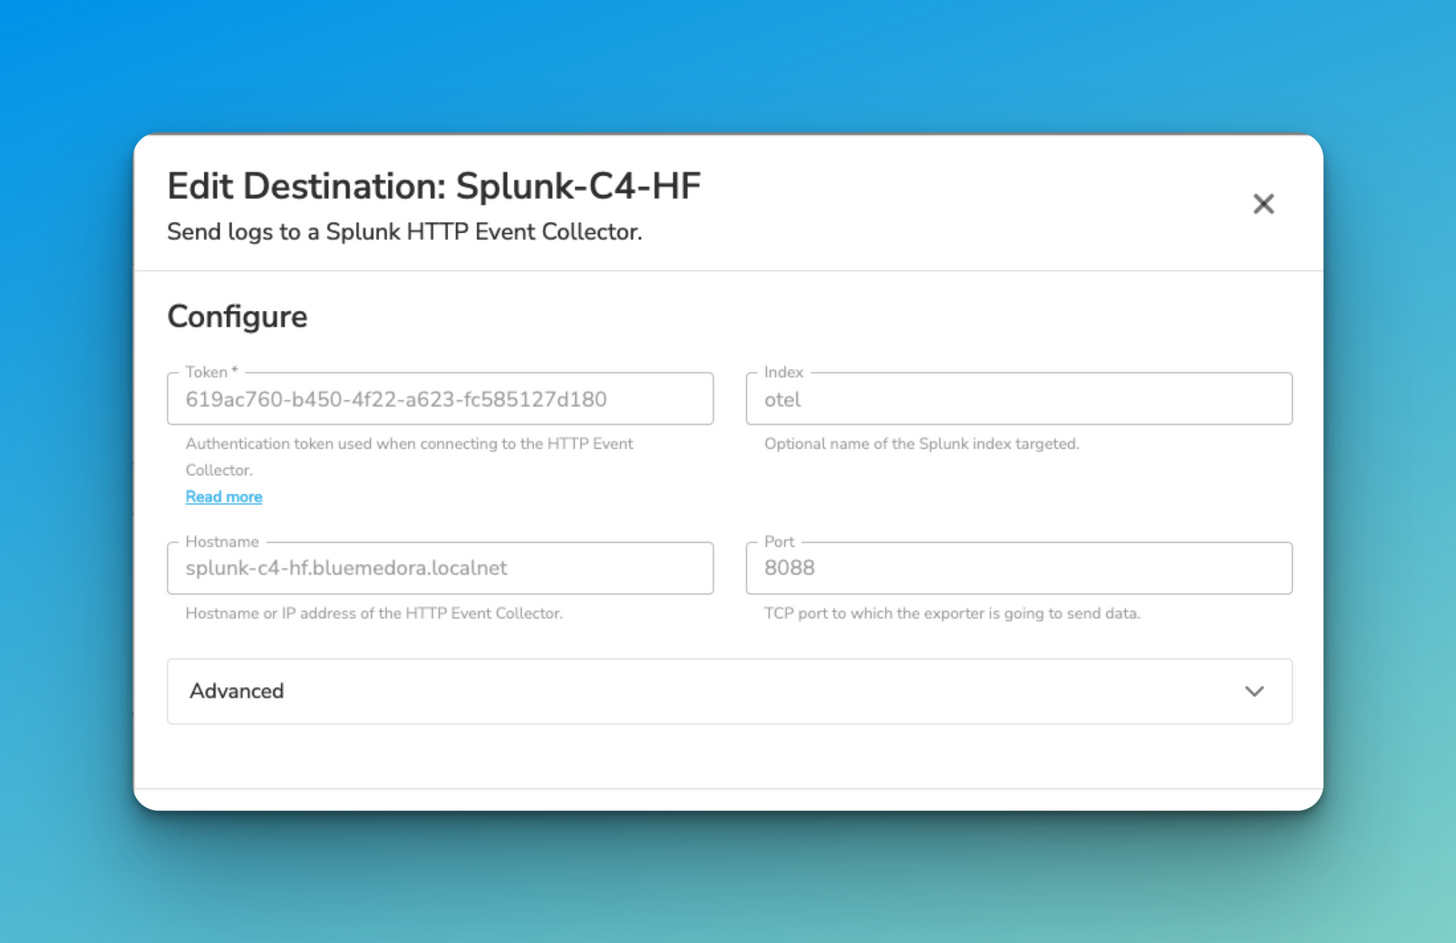
In BindPlane, we create a configuration for the agent that matches the parameters specified in the UF and HF. This configuration will have a TCP source that matches the port specified in the UF tcpout:bindplane stanza, and a destination that matches the HF HEC data input.
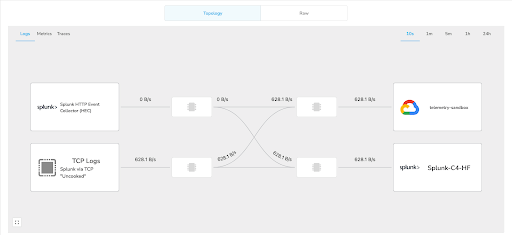
Data Flowing
Now that everything is configured correctly, data should flow through the BindPlane Agent. We can see this data flow on the topology view on the agent page in BindPlane.
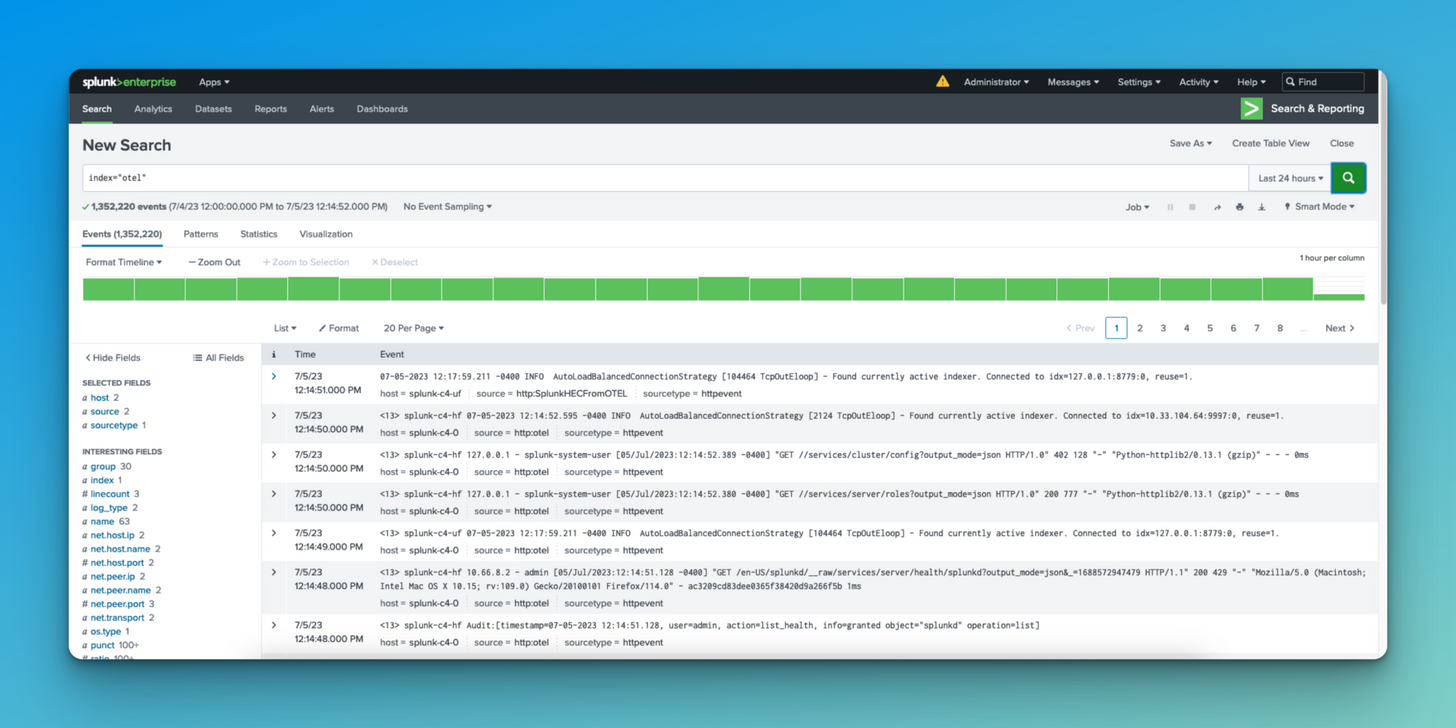
Additionally, the data can be viewed on the Splunk Indexer.
The data is also being replicated to Google Cloud Logging, which we will dive into in part 2 of this series.
Conclusion
With the proper configuration in place, data is actively flowing through the BindPlane Agent. This integration gives great flexibility in data input and extraction. In part 2 of this series, additional sources will be implemented into the pipeline; which can be sent into the Splunk ecosystem. Additionally, data duplication for Google Cloud Logging will be examined. Part 3 of the series will look at deeper use cases of the integration, including breaking Splunk vendor lock, data retention compliance, and more.
Follow this space to keep up with all our future posts and simplified configurations for various sources. For questions, requests, and suggestions, contact our support team at support@observIQ.com or join our community Slack Channel.