How we simplified our React components using Apollo Client and JavaScript Classes

With the release of BindPlane 1.15.0, observe has introduced a new rollout flow. Now, a user can apply configuration changes to agents in a safer and more observable way. This new feature posed some interesting challenges on the front end, necessitating creative programming to keep our front end simple, readable, and well-tested.
The Problem
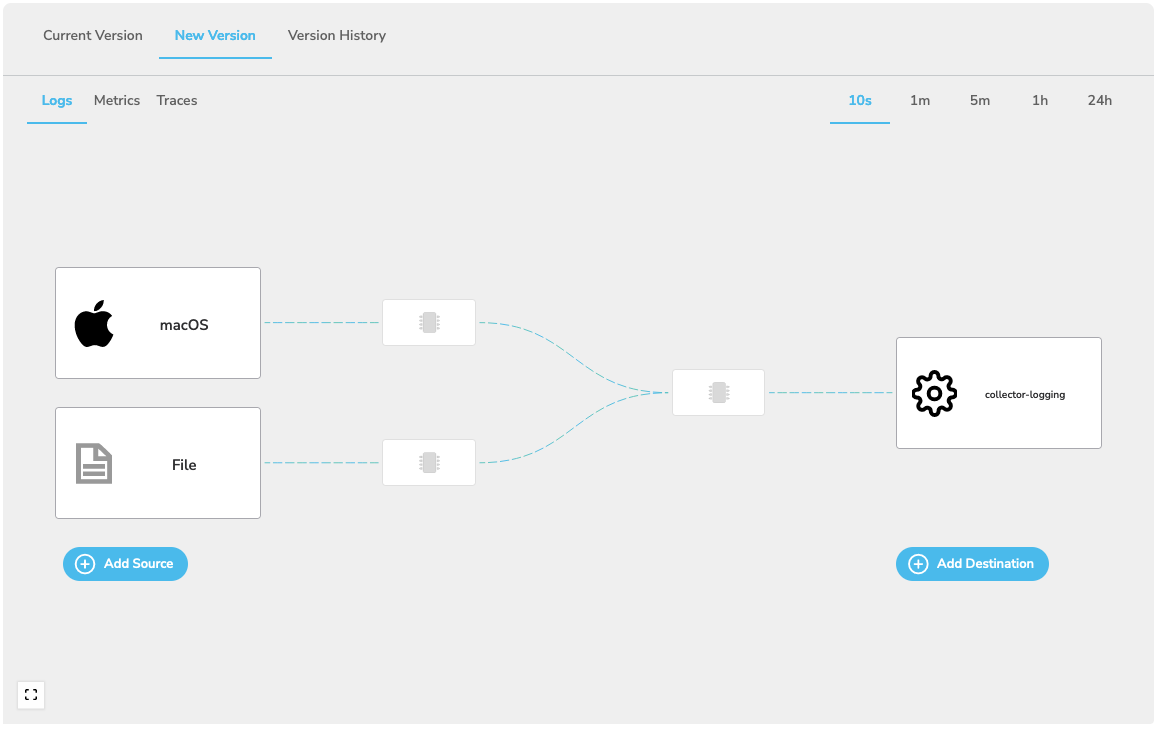
Our ConfigurationEditor component lies on a single Configuration page. This component is at the core of functionality for BindPlane OP, allowing users to view their current Configuration version, edit a new One, and inspect historical versions.

This component controls which tab a user sees and the selected telemetry pipeline (i.e., Logs, Metrics, or Traces).
Determining the initial state of this component isn’t straightforward, as it depends on data we’ve fetched from our server via the Apollo GraphQL client. Below is a simplified version of what this logic might look like.
1export const ConfigurationEditor: React.FC<ConfigurationEditorProps> = ({
2  configurationName,
3  isOtel,
4  hideRolloutActions,
5}) => {
6  // Declare stateful variables, `tab`, `selectedTelemetry`, and `selectedVersion`.
7
8  // Fetch our data
9  const { data, refetch } = useGetConfigurationVersionsQuery({
10    variables: {
11      name: configurationName,
12    },
13  });
14
15  // Begin our logic for finding versions for pending, latest, new, and history.
16  const pendingVersion = data?.configurationHistory.find(
17    (version) => version.status.pending && !version.status.current
18  );
19
20  const currentVersion = data?.configurationHistory.find(
21    (version) => version.status.current
22  );
23
24  const newVersion = data?.configurationHistory.find(
25    (version) =>
26      version.status.latest &&
27      !version.status.pending &&
28      !version.status.current
29  );
30
31  const versionHistory = data?.configurationHistory.filter(
32    (version) =>
33      !version.status.latest &&
34      !version.status.current &&
35      !version.status.pending
36  );
37
38  // useEffect to update the stateful variables based on the data
39  useEffect(() => {
40    // Determine which tab to display
41    if (newVersion) {
42      setTab("new");
43    } else if (pendingVersion) {
44      setTab("pending");
45    } else if (currentVersion) {
46      setTab("current");
47    }
48
49    // Set the selected version based on the latest in version history
50    const latestVersionHistory = versionHistory?.reduce((prev, current) =>
51      prev.metadata.version > current.metadata.version ? prev : current
52    ).metadata.version;
53
54    setSelectedVersion(latestVersionHistory);
55
56    // Set the selected telemetry type
57    if (
58      currentVersion &&
59      currentVersion.activeTypes &&
60      currentVersion.activeTypes.length > 0
61    ) {
62      setSelectedTelemetry(currentVersion.activeTypes[0]);
63    } else if (versionHistory) {
64    }
65
66    if (versionHistory) {
67      const latest = versionHistory[0];
68      if (latest && latest.activeTypes && latest.activeTypes.length > 0) {
69        setSelectedTelemetry(latest.activeTypes[0]);
70      }
71    }
72  }, [newVersion, currentVersion, pendingVersion, versionHistory]);
73
74  return <>{/* Render our sub components with this data */}</>;
75};Alright, what’s going on here? We:
- Determine several variables (e.g., newVersion) based on the data we receive.
- We used a useEffect hook to set our stateful variables when those variables change.
It works, but we see some issues right away:
- It’s hard to test. This will require a lot of mocked GraphQL responses to make sure we’re displaying the correct state.
- It’s hard to read. This maze of .find and data?. is sure to be glossed over. When code isn’t read, it isn’t understood and is more likely to be broken.
- We’re unsure if our data is defined or not. It’s not clear that our data variable has returned from the request. It’s harder to use attributes on this data in sub-components.
The Solution
We will clean this up, make it more readable and testable, and be sure that our data is defined.
Define a Data Class
At observIQ, we’re a big Go shop. One of the most powerful paradigms with Go is the ability to define methods on data structures. We can similarly do this in JavaScript by using classes. Check out this helper class.
1export class VersionsData implements GetConfigurationVersionsQuery {
2  configurationHistory: GetConfigurationVersionsQuery["configurationHistory"];
3  constructor(data: GetConfigurationVersionsQuery) {
4    this.configurationHistory = data.configurationHistory;
5  }
6}What did we do?
- We defined a class that implements our GetConfigurationVersionsQuery type. That is, we now have a class with all the fields of our query, and we can add some functions to help us work with the data.
- We are constructing the class with a data argument that must be defined. We can be sure that this data is present and ok to work with.
For example, we can add a helper class to find our newVersion.
1export class VersionsData implements GetConfigurationVersionsQuery {
2  configurationHistory: GetConfigurationVersionsQuery["configurationHistory"];
3  constructor(data: GetConfigurationVersionsQuery) {
4    this.configurationHistory = data.configurationHistory;
5  }
6
7  /**
8   * findNewVersion returns the latest version if it is not pending or stable
9   */
10  findNew() {
11    return this.configurationHistory.find(
12      (version) =>
13        version.status.latest &&
14        !version.status.pending &&
15        !version.status.current
16    );
17  }
18}Why is this better?
- This class is easily unit-testable. We can test that we correctly determine these versions based upon our data rather than a mocked response in a component test.
- It reduces lines and logic in our component, which we want to keep simple and readable.
Let’s rewrite our component using these helper functions.
1export const ConfigurationEditor: React.FC<ConfigurationEditorProps> = ({
2  configurationName,
3  isOtel,
4  hideRolloutActions,
5}) => {
6  // Declare stateful variables, `tab`, `selectedTelemetry`, and `selectedVersion`.
7
8  // Fetch our data
9  const { data, refetch } = useGetConfigurationVersionsQuery({
10    variables: {
11      name: configurationName,
12    },
13  });
14
15  // useEffect to update the stateful variables based on the data
16  useEffect(() => {
17    if (!data) {
18      return;
19    }
20
21    const versionsData = new VersionsData(data);
22
23    if (versionsData.findNew()) {
24      setTab("new");
25    } else if (versionsData.findPending()) {
26      setTab("pending");
27    } else if (versionsData.findCurrent()) {
28      setTab("current");
29    }
30
31    // find the highest version number in history
32    setSelectedVersion(versionsData.latestHistoryVersion());
33
34    // Set the selected telemetry type
35    setSelectedTelemetry(
36      versionsData.firstActiveType() ?? DEFAULT_TELEMETRY_TYPE
37    );
38  }, [data]);
39
40  return <>{/* Render our sub components with this data */}</>;
41};Hey! That’s looking a lot better. We got rid of an entire block of logic inside the components render cycle and put everything in our useEffect. However, we can still make further improvements.
Change out our useEffect for the onCompleted callback
React’s useEffect hook is a powerful tool to update our state based on changing variables. However, it’s not quite right in this case, as can be seen by the smelly if statement:
1if (!data) {
2  return;
3}Instead, let’s use the handy onCompleted callback available in our query. Something like this:
1export const ConfigurationEditor: React.FC<ConfigurationEditorProps> = ({
2  configurationName,
3  isOtel,
4  hideRolloutActions,
5}) => {
6  const [versionsData, setVersionsData] = useState<VersionsData>();
7  // Declare stateful variables, `tab`, `selectedTelemetry`, and `selectedVersion`.
8
9  // Fetch our data
10  const { refetch } = useGetConfigurationVersionsQuery({
11    variables: {
12      name: configurationName,
13    },
14    onCompleted(data) {
15      const newVersionsData = new VersionsData(data);
16      setSelectedVersion(newVersionsData.latestHistoryVersion());
17
18      if (newVersionsData.findNew()) {
19        setTab("new");
20      } else if (newVersionsData.findPending()) {
21        setTab("pending");
22      } else if (newVersionsData.findCurrent()) {
23        setTab("current");
24      }
25      setVersionsData(newVersionsData);
26      setSelectedTelemetry(
27        newVersionsData.firstActiveType() ?? DEFAULT_TELEMETRY_TYPE
28      );
29    },
30  });
31
32  return <>{/* Render our sub components with this data */}</>;
33};What have we done?
- We created a new stateful variable that contains our VersionsData class. We are setting it based on data we receive in onCompleted.
- We took all the logic from our useEffect and placed it in onCompleted.
Why is this better?
We know data is defined. This onCompleted callback requires that our data has returned without error.
We only do this logic once. We only determine the initial state when our data comes in – not on first render.
Summary
By utilizing Javascript classes and the onCompleted callback, we have taken our front-end logic out of the component. React components are easiest to understand when they contain only their React-y things, like stateful variables and handler functions.
Sometimes complex logic in the front end is unavoidable – but we found this pattern incredibly beneficial in simplifying our React components, improving readability, and enhancing testability.


