TLS: Self Signed
How to configure BindPlane OP with TLS using Step CLI for certificate generation
Self Signed TLS with Step CLI
Step CLI can be used to create your own certificate authority and
server certificates. Step provides an easy-to-use interface. Alternatively, you could use OpenSSL.
Prerequisites
This guide assumes you will be deploying BindPlane and its agents to a network that has a working
Domain Name System (DNS). It is expected that agent systems will be able to connect to Bindplane
using its fully qualified domain name (FQDN).
If you do not have working DNS, it is possible to use /etc/hosts as a workaround. See this guide for details.
Environment
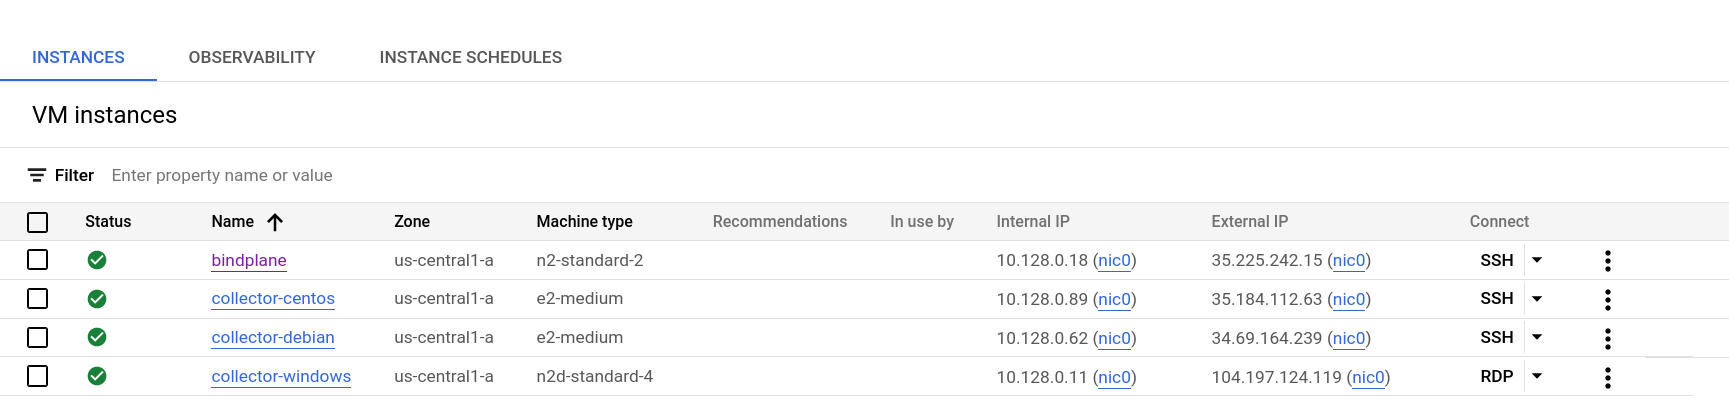
For this demonstration, we have four compute instances running on Google Cloud. The objective is to configure
BindPlane OP to use a server TLS certificate, and have all clients and collectors connect using TLS.
The following instances are deployed:
bindplane: Instance that hosts the BindPlane OP server.collector-debian: Debian-based instance that will host a BindPlane OP agent.collector-centos: CentOS-based instance that will host a BindPlane OP agent.collector-windows: Windows Server instance that will host a BindPlane OP agent.
Each instance belongs to a VPC in the project bindplane, which means each instance has a DNS name
with the following format: {{instance name}}.c.bindplane.internal.
Each instance has the following fully qualified domain name (FQDN):
- bindplane:
bindplane.c.bindplane.internal - collector-debian:
collector-debian.c.bindplane.internal - collector-centos:
collector-centos.c.bindplane.internal - collector-windows:
collector-windows.c.bindplane.internal
All instances within the network can resolve each other using their FQDN. DNS plays a critical
role when using TLS, as it allows certificates to be verified against their hostname. If the hostname does not match
the certificate, the connection will be rejected unless steps are taken to disable TLS verification.
Deploy and Configure BindPlane
Follow the BindPlane OP Server Install Guide to install BindPlane OP.
Once installed, modify the /etc/bindplane/config.yaml to look like this:
Note that auth.secretKey and auth.sessionSecret should be random uuid values. You can generate your own
with the uuidgen command.
Make sure network.remoteURL use the correct FQDN. You can check your server's FQDN using the
hostname command:
Once BindPlane is configured, restart the server.
Verify that BindPlane OP is working by connecting to the public IP address on port 3001. In this example, that would be
http://bindplane.c.bindplane.internal:3001.
Create Certificates with Step
On the instance running your BindPlane OP server, install the step command line. Instructions
for installing step can be found here.
Create Certificate Authority
The following commands will write a certificate and private key
to tls-ca/ca.crt and tls-ca/ca.key in your working directory.
Create BindPlane Server Certificate
The following commands will generate a server certificate signed by the CA previously
created. The certificate and private key will be written to /etc/bindplane/tls/bindplane.crt
and /etc/bindplane/tls/bindplane.key
Configure BindPlane to use TLS
With the server certificate created, make the following changes to /etc/bindplane/config.yaml:
- Modify
network.remoteURLto usehttps - Add
tlsCertandtlsKey
Your configuration will look similar to this:
With the configuration updated, restart BindPlane OP:
To verify that BindPlane OP is using TLS, navigate to your server's IP address using https. For example,
https://bindplane.c.bindplane.internal:3001.
You should expect your browser to present a warning screen. This is because your workstation does not trust the
certificate. This is expected because you have not imported the certificate authority into your trust store. At this
time, it is safe to skip the warning and continue. Note that this warning should never be ignored in production, or in areas where
it is not expected.
Import Certificate Authority on Collector Systems
In all instances that will be running a BindPlane OP agent, we need to import
the certificate authority. This will allow the collector software to trust the BindPlane
server certificate.
- Copy
tls-ca/ca.crtto all systems that will be running a BindPlane agent - Import the
ca.crtinto the trust store on all agent systems - Install agents
For instructions on how to import a certificate authority, see this blog.
Once all agent systems have the certificate authority imported, you can install agents using the command
generated in the BindPlane OP web interface.
Example Linux install command:
Note that the command uses the value from server.remoteURL in /etc/bindplane/config.yaml as the endpoint that the agent
should connect to. The wss protocol indicates that TLS should be used.
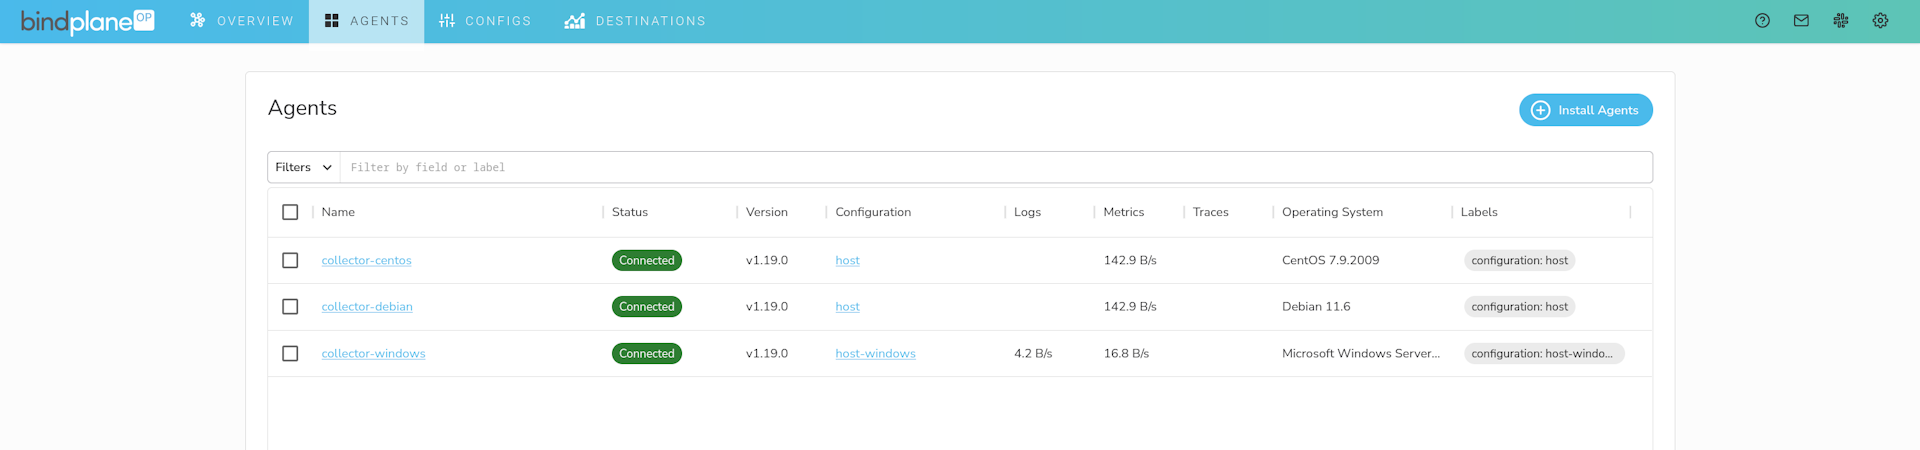
Once installed, the manager configuration at /opt/observiq-otel-collector/manager.yaml will look something like this:
Finished! Agents appear in the web interface, indicating that TLS is working.