Multi-Node Architecture on Google Cloud
Deploy BindPlane OP in a multi-node configuration on Google Cloud
Google Cloud can be used to host a scalable BindPlane OP architecture by leveraging multiple BindPlane OP instances in combination with Compute Engine, Cloud Load Balancer, and Pub/Sub.
Prerequisites
The following requirements must be met:
- You must have access to a Google Cloud Project
- You must have a BindPlane OP Enterprise or Google license
- You must be comfortable working with the following Google services
Architecture
See the High Availability documentation for details on the architecture that is used in this guide.
Deployment
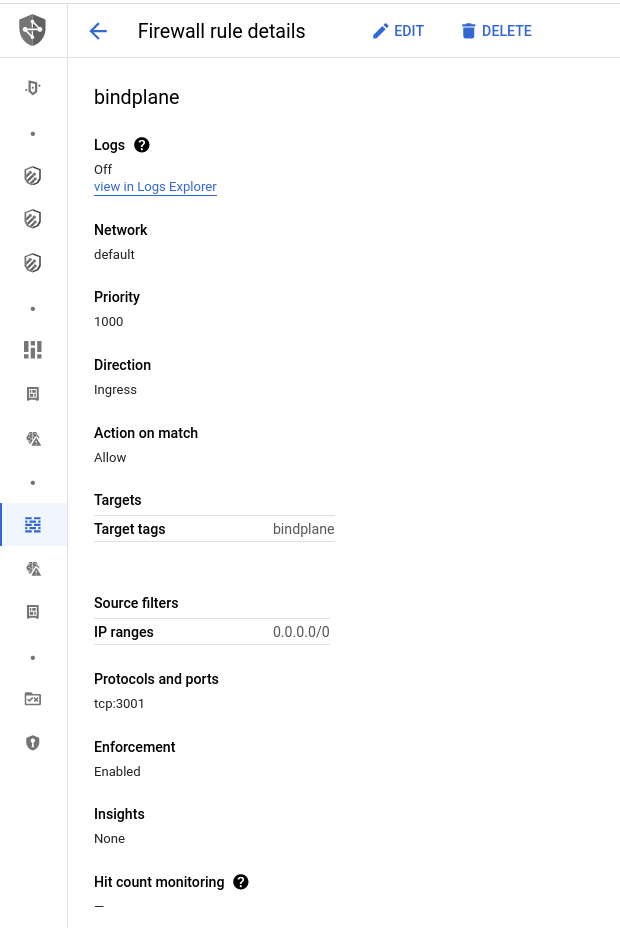
Firewall
Create a firewall rule that will allow connections to BindPlane on TCP/3001.
- Name:
bindplane - Target Tags:
bindplane - Source Filters:
- IP ranges:
0.0.0.0*.
- IP ranges:
- Protocols and Ports:
TCP/3001
*Allowing access from all IP ranges will allow anyone on the internet access to BindPlane OP. This firewall rule should be restricted to allow access only from networks you trust.
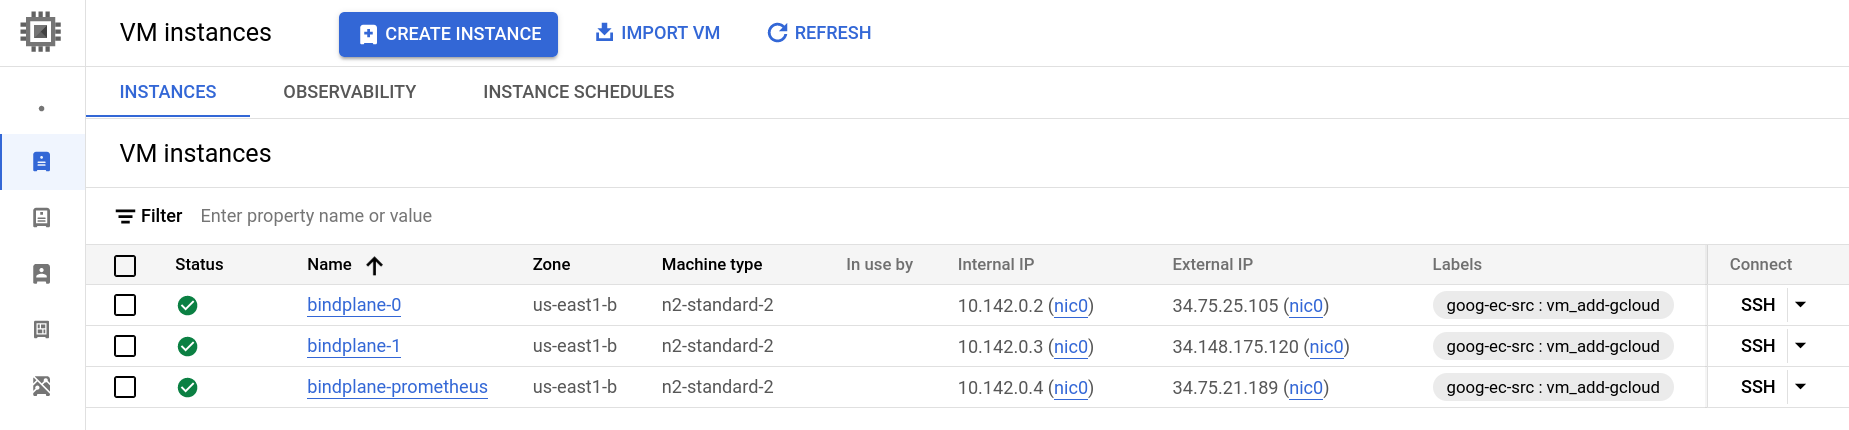
Compute Engine
In this guide, we will create three compute instances, bindplane-0, bindplane-1, and bindplane-prometheus. See the prerequisites for information on individually sizing your instances.
We expect this deployment to handle 200 agents, so we will select the n2-standard-2 instance type, which has the exact core count required, and more than enough memory. We will use the same instance settings for Prometheus.
- 2 cores
- 8 GB memory
- 60 GB persistent ssd
For the BindPlane instances, use the following additional configuration.
- Static public IP addresses
- Scopes
- Set Cloud Platform to "enabled"
- Set pub/sub to "enabled"
- Network Tags:
bindplane
Prometheus
Prometheus is used as a shared storage backend for BindPlane OP's agent throughput measurements.
Connect to the bindplane-prometheus instance and follow our Self-Managed Prometheus documentation.
Cloud SQL
PostgreSQL is used as a shared storage backend for BindPlane OP. Google has many options available for production use cases, such as replication and private VPC peering.
Deploy
In this guide, we will deploy a basic configuration with:
- 4 cores
- 16GB memory
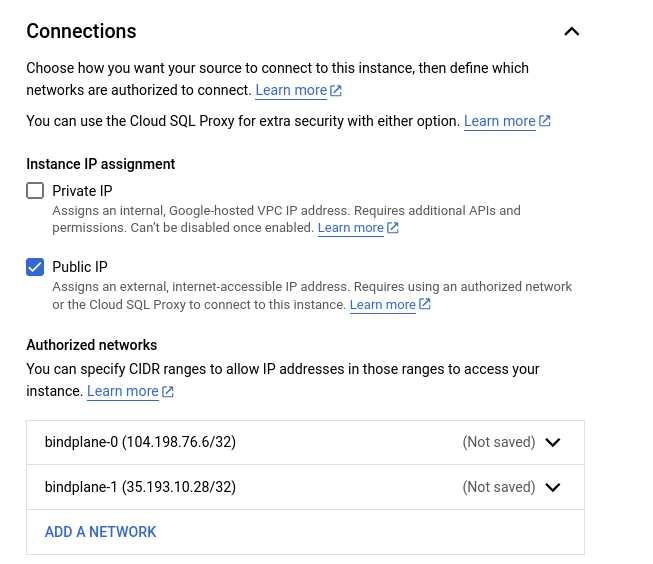
- 250GB SSD for storage
- Authorized Networks (Under "connections") set to the public IP addresses of the previously deployed compute instances
- If you would prefer to keep the CloudSQL instance off of the public internet, Configure connectivity using VPC peering
All other options are left unconfirmed or set to their default values.

Configure
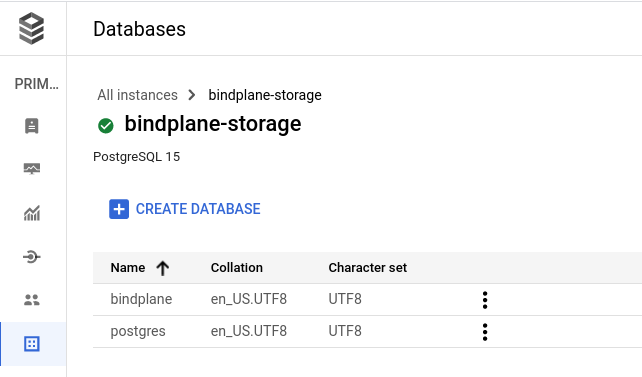
Once the Cloud SQL instance is deployed, we need to create a database and a database user.
On the database's page, select "create database" and name it bindplane.
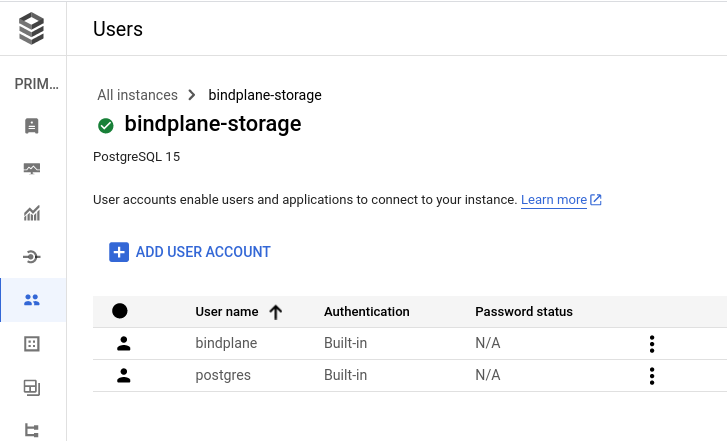
On the user's page, add a new user named bindplane and use a secure password, or choose the "generate password" option. Note the password, it will be required when BindPlane OP is configured.
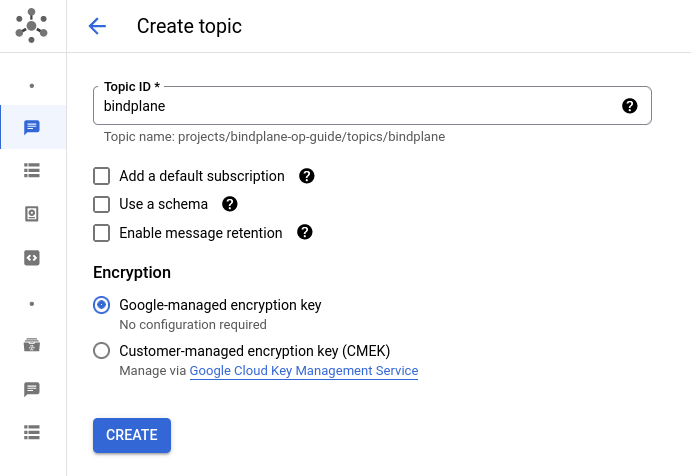
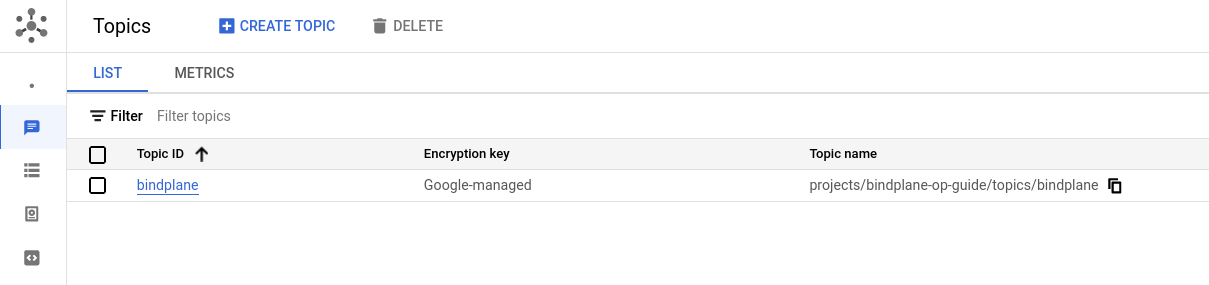
Pub/Sub
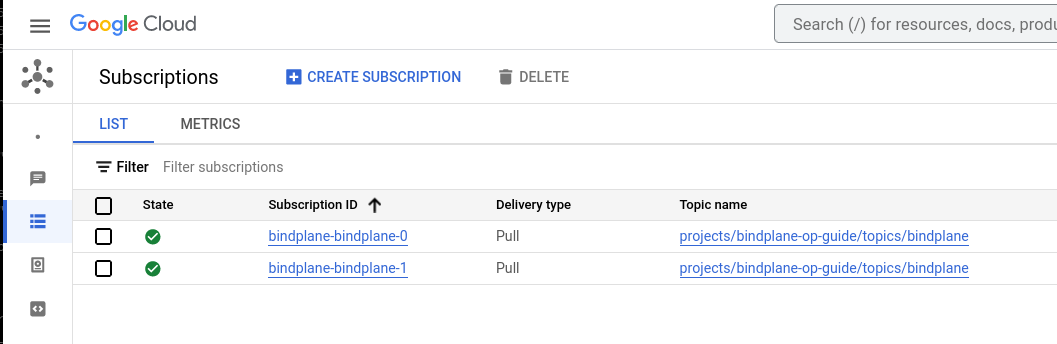
Google Pub/Sub is used by BindPlane OP to share information between instances. Create a new topic named bindplane. Uncheck the "add a default subscription" option. You can keep all other options set to their default value.
Cloud Load Balancer
In order to distribute connections between multiple BindPlane OP instances, a TCP load balancer is required. This guide will use an internet-facing load balancer, however, an internal load balancer is also supported.
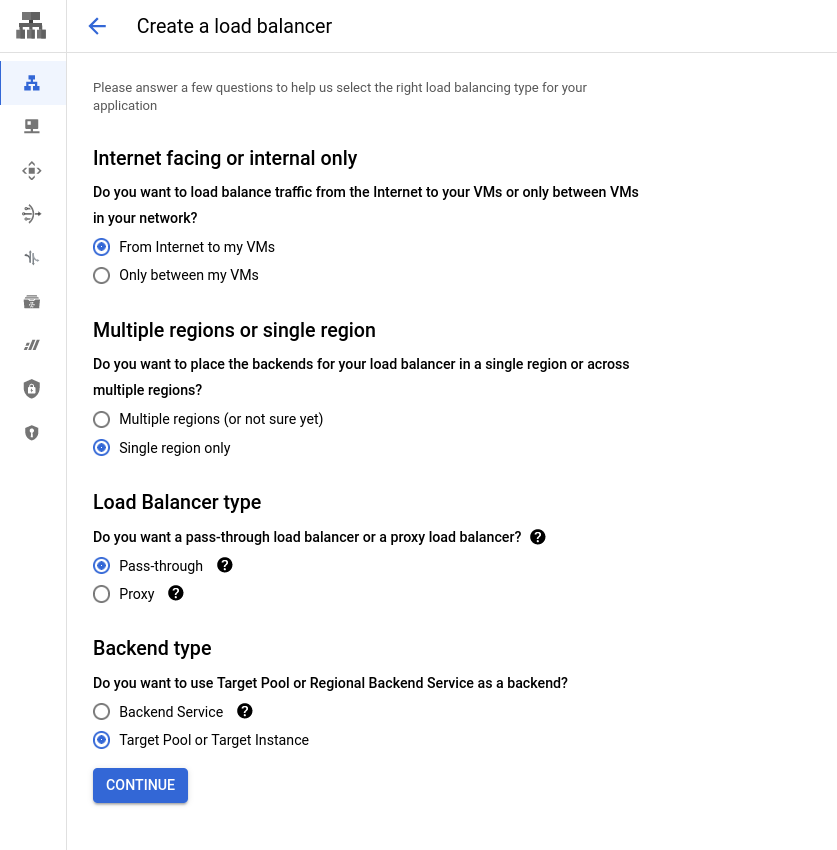
Create a load balancer with the following options:
- From the internet to my VMs
- Single region only
- Pass-through
- Target Pool or Target Instance
Backend Configuration
Configure the Backend with the following options:
- Name:
bindplane - Region: The region used for your compute instances, pub/sub topic, and CloudSQL instance
- Backends: "Select Existing Instances"
- Select your BindPlane OP instances
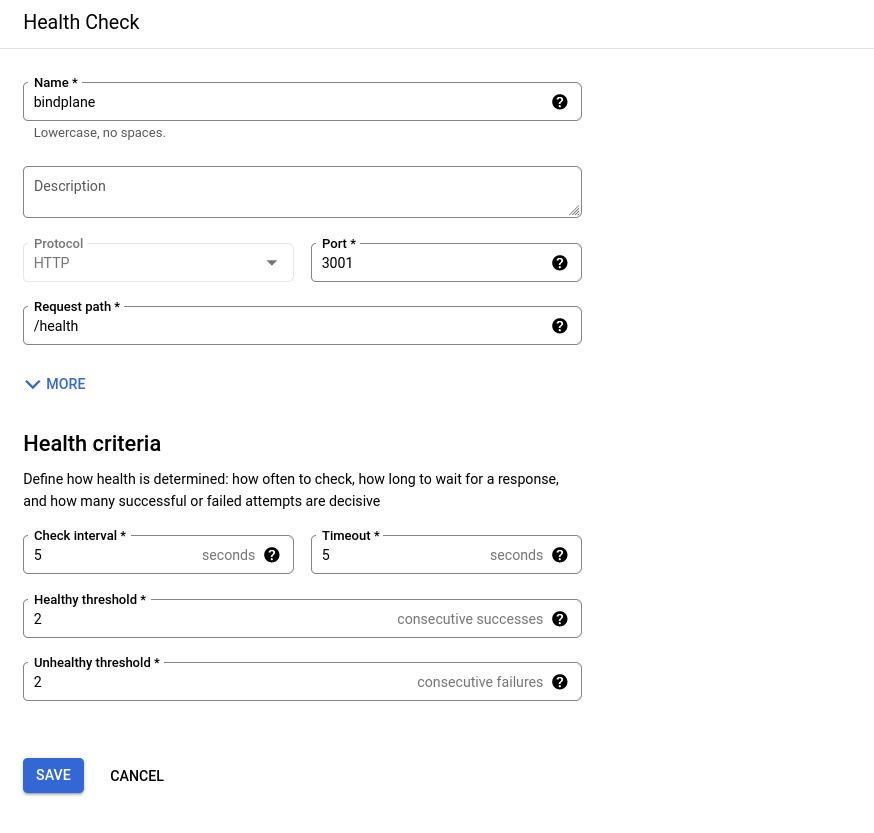
- Health check: Choose "Create new health check"
- Name:
bindplane - Protocol:
http - Port:
3001 - Request Path:
/health - Health criteria: Use default values
- Name:

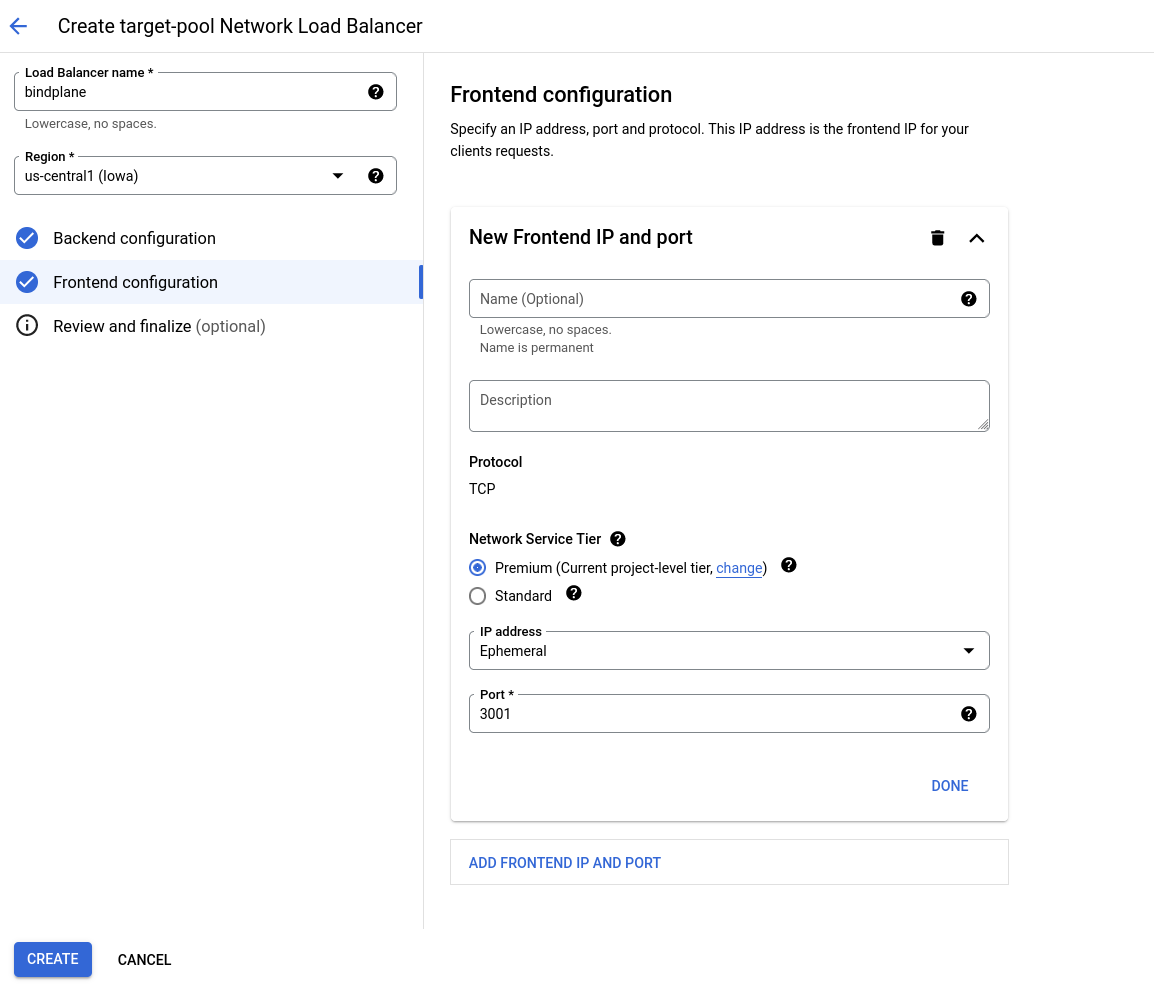
Frontend Configuration
Configure the Frontend with the following options:
- New Frontend IP and Port:
- Name:
bindplane - Port:
3001
- Name:
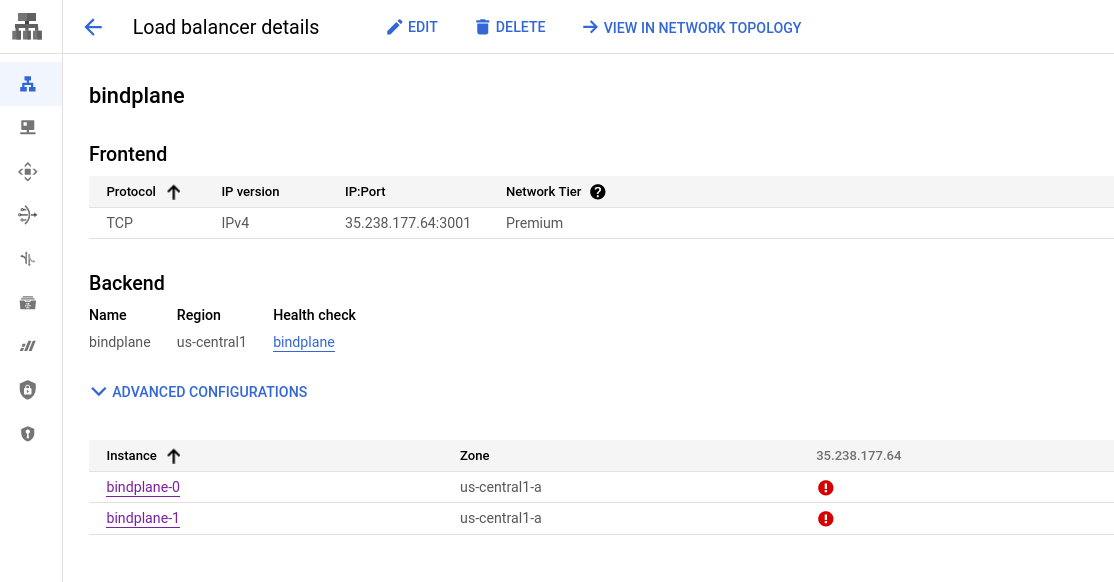
Review and Create
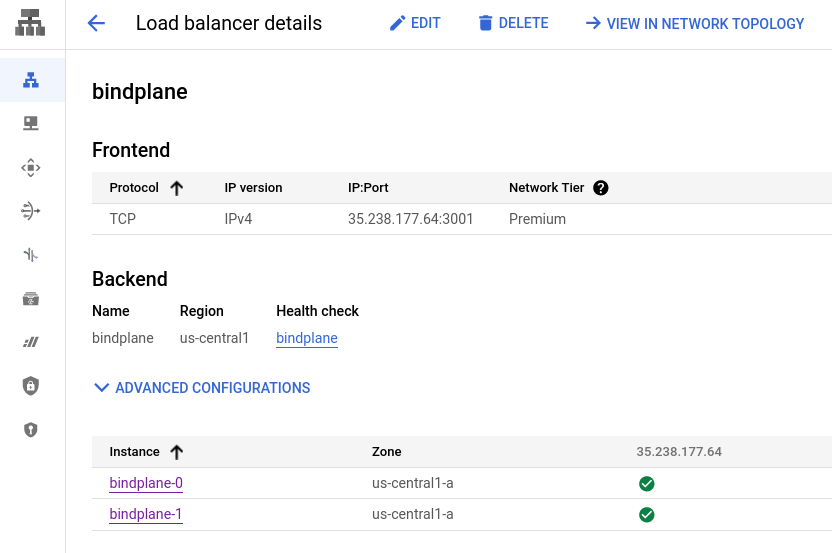
Review the configuration and choose "Create". Once created, the load balancer will exist and it should be failing the healtchecks, because BindPlane OP is not installed and configured yet.
Install BindPlane OP
With Cloud SQL, Pub/Sub, and the load balancer configured, BindPlane OP can be installed on the previously deployed compute instances.
Install Script
Connect to both instances using SSH and issue the installation command:
Initial Configuration
Once the script finishes, run the init server command on one of the instances. You will copy the
generated configuration file to the second instance after configuring the first.
- License Key: Paste your license key.
- Server Host:
0.0.0.0to listen on all interfaces. - Server Port:
3001 - Remote URL: The IP address of your load balancer.
- Example:
http://35.238.177.64:3001
- Example:
- Enable Multi Project: Yes
- Auth Type: Single User*
- Storage Type:
postgres - Host: Public IP address of the CloudSQL instance.
- Port:
5432 - Database Name:
bindplane - SSL Mode:
require - Maximum Number of Database Connections:
100 - PostgreSQL Username:
bindplane - PostgreSQL Password: The password you configured during the CloudSQL setup.
- Event Bus Type:
Google PubSub - PubSub Project ID: Your Google project id
- PubSub Credentials File: Leave this blank, authentication will be handled automatically.
- PubSub Topic:
bindplane - PubSub Subscription: Leave blank, subscriptions will be managed by each BindPlane instance.
- Accept Eula: Choose yes if you agree.
- Restart the server?:
no
note
📘 You can select LDAP or Active Directory if you do not wish to use basic auth. This guide's scope will not cover external authentication.
Copy the contents from the file /etc/bindplane/config.yaml to the same location on the second instance.
This will ensure both instances have an identical configuration. Specifically, both instances require
the same value for auth.sessionSecret.
Configure Remote Prometheus
BindPlane OP uses Prometheus to store agent throughput metrics. When operating with multiple nodes, a shared Prometheus instance is required.
Stop BindPlane OP:
Open the configuration file with your favorite editor. Make sure to use sudo or
the root user as the configuration file is owned by the bindplane system project.
Find the Prometheus section. It will look like this:
Make two changes.
- Add
enableRemote: true - Update
host: bindplane-prometheus
The final configuration will look like this:
These changes will instruct BindPlane to use a remote Prometheus instance.
Start BindPlane
Restart all BindPlane instances in order to pickup the latest configuration.
Once BindPlane starts, the Pub/Sub subscriptions are configured automatically:
After a few moments, the load balancer healthchecks will begin to pass:
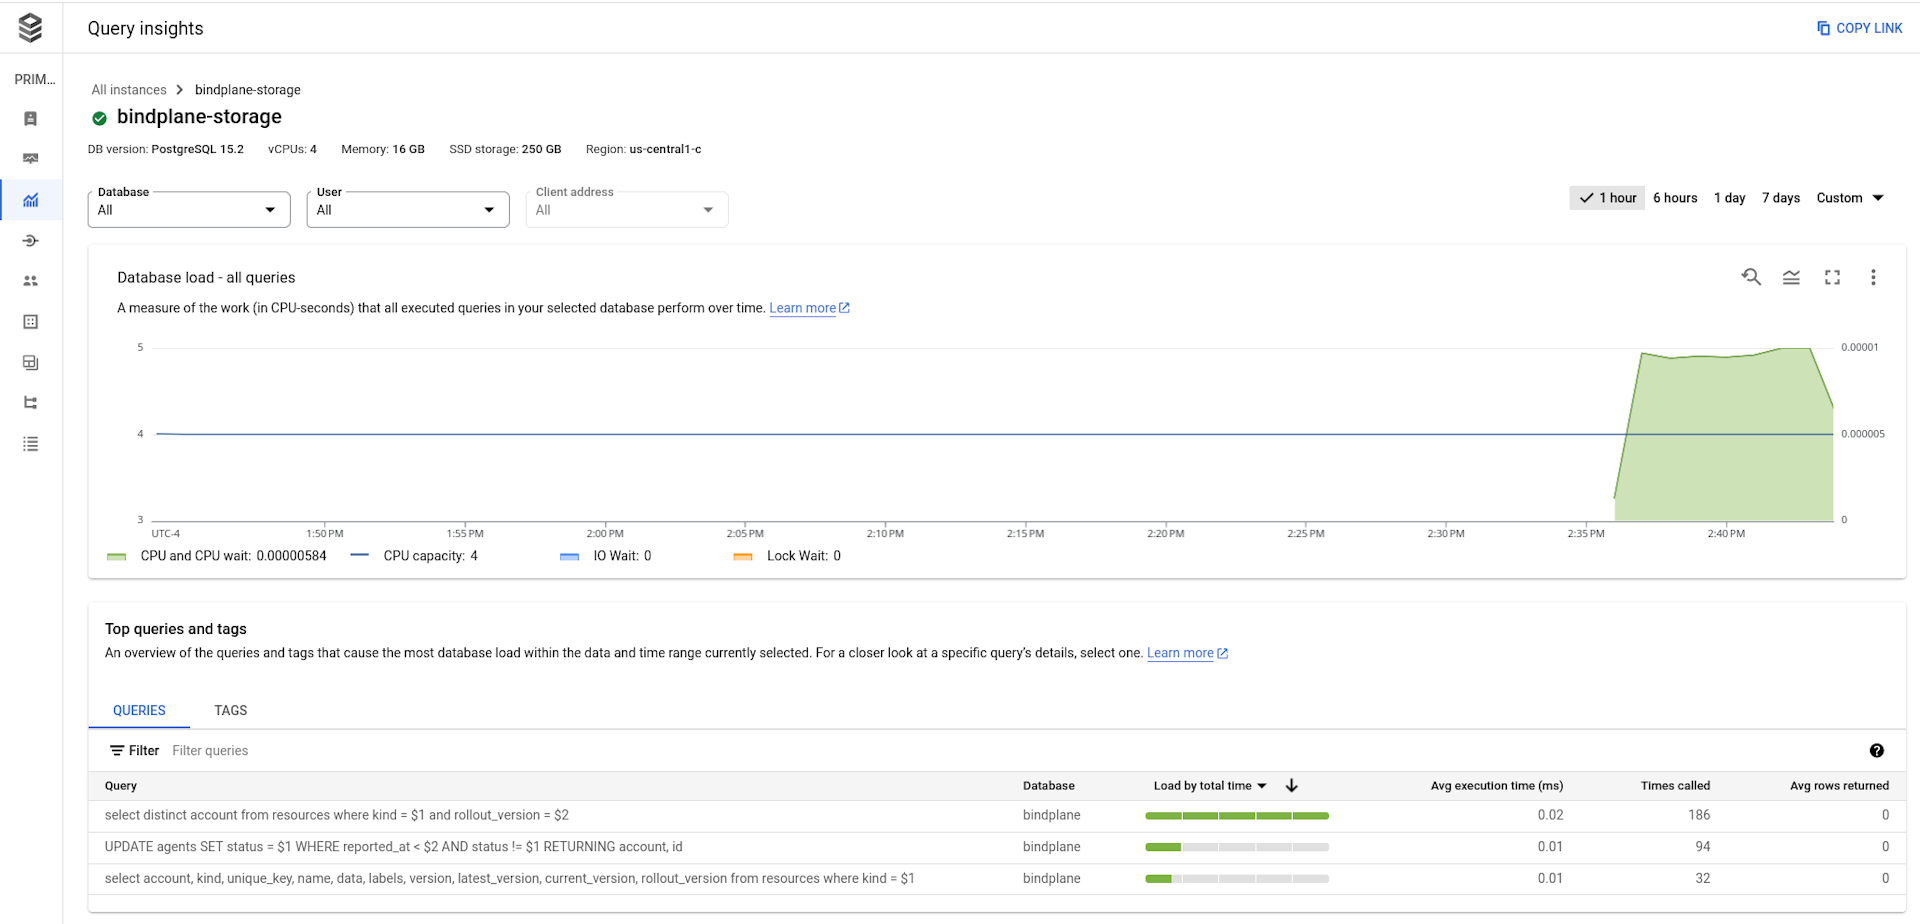
Cloud SQL activity can be monitored by enabling Query Insights.
Use BindPlane OP
Connect to BindPlane OP
Browse to http://<loadbalancer address>:3001 and sign into the BindPlane installation using
the username and password you used during the configuration step.
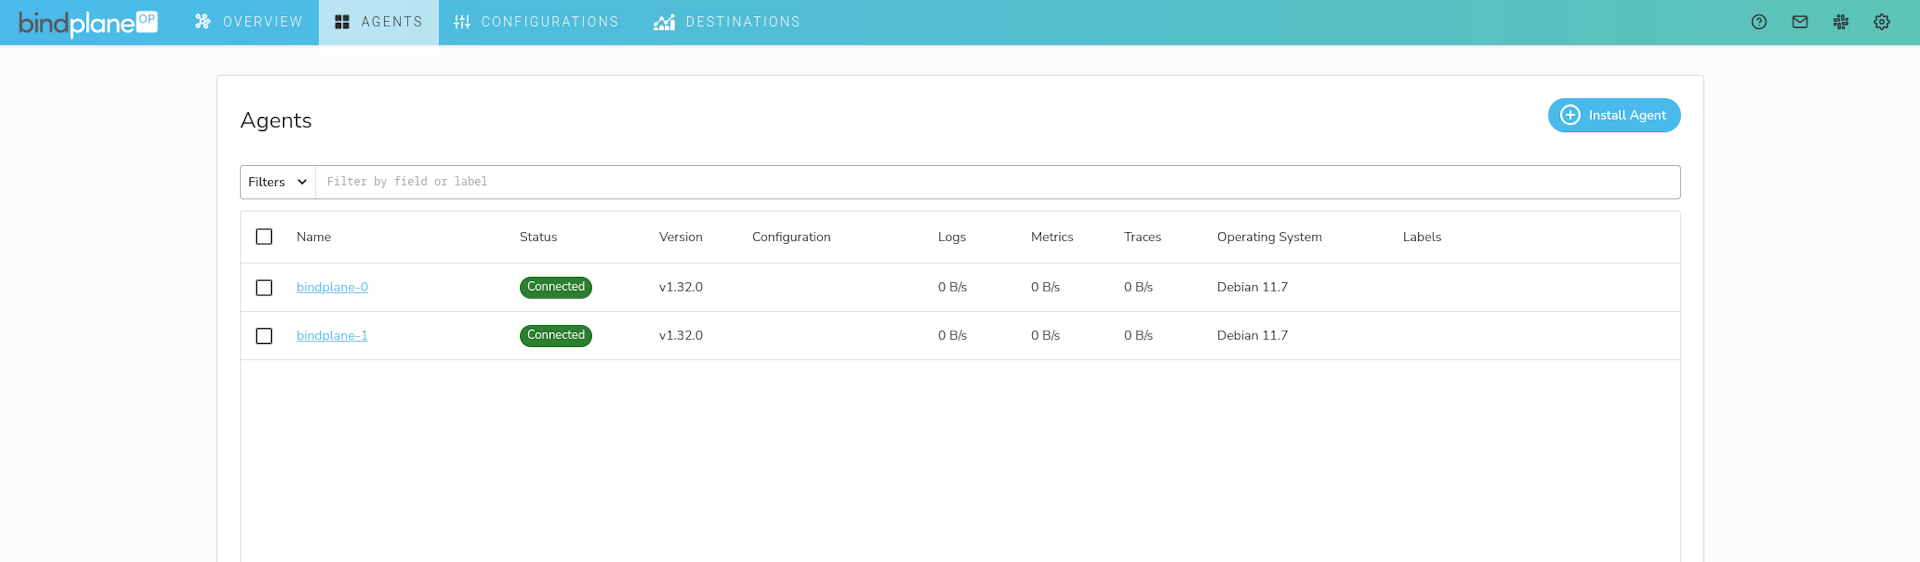
Install Agents
On the agents page, choose "Install Agent" and inspect the installation command. The -e flag should be set to the load balancer address. If it is not, this indicates a misconfiguration in BindPlane's remoteURL configuration option in /etc/bindplane/config.yaml.
To quickly test, deploy an agent to each of the BindPlane compute instances.