1. Install BindPlane OP Server
Welcome to BindPlane OP
This guide is broken into four steps to help you get up and running with BindPlane OP.
BindPlane OP will run on Linux or as a container using Docker.
This guide will walk you through installing BindPlane OP on a Linux or Docker system, installing an agent, and collecting and routing your telemetry.
Step 1: Installing and Configuring BindPlane OP
Installation
Check out our advanced setup page if you need additional installation options such as Kubernetes, TLS or if you will be using a Proxy.
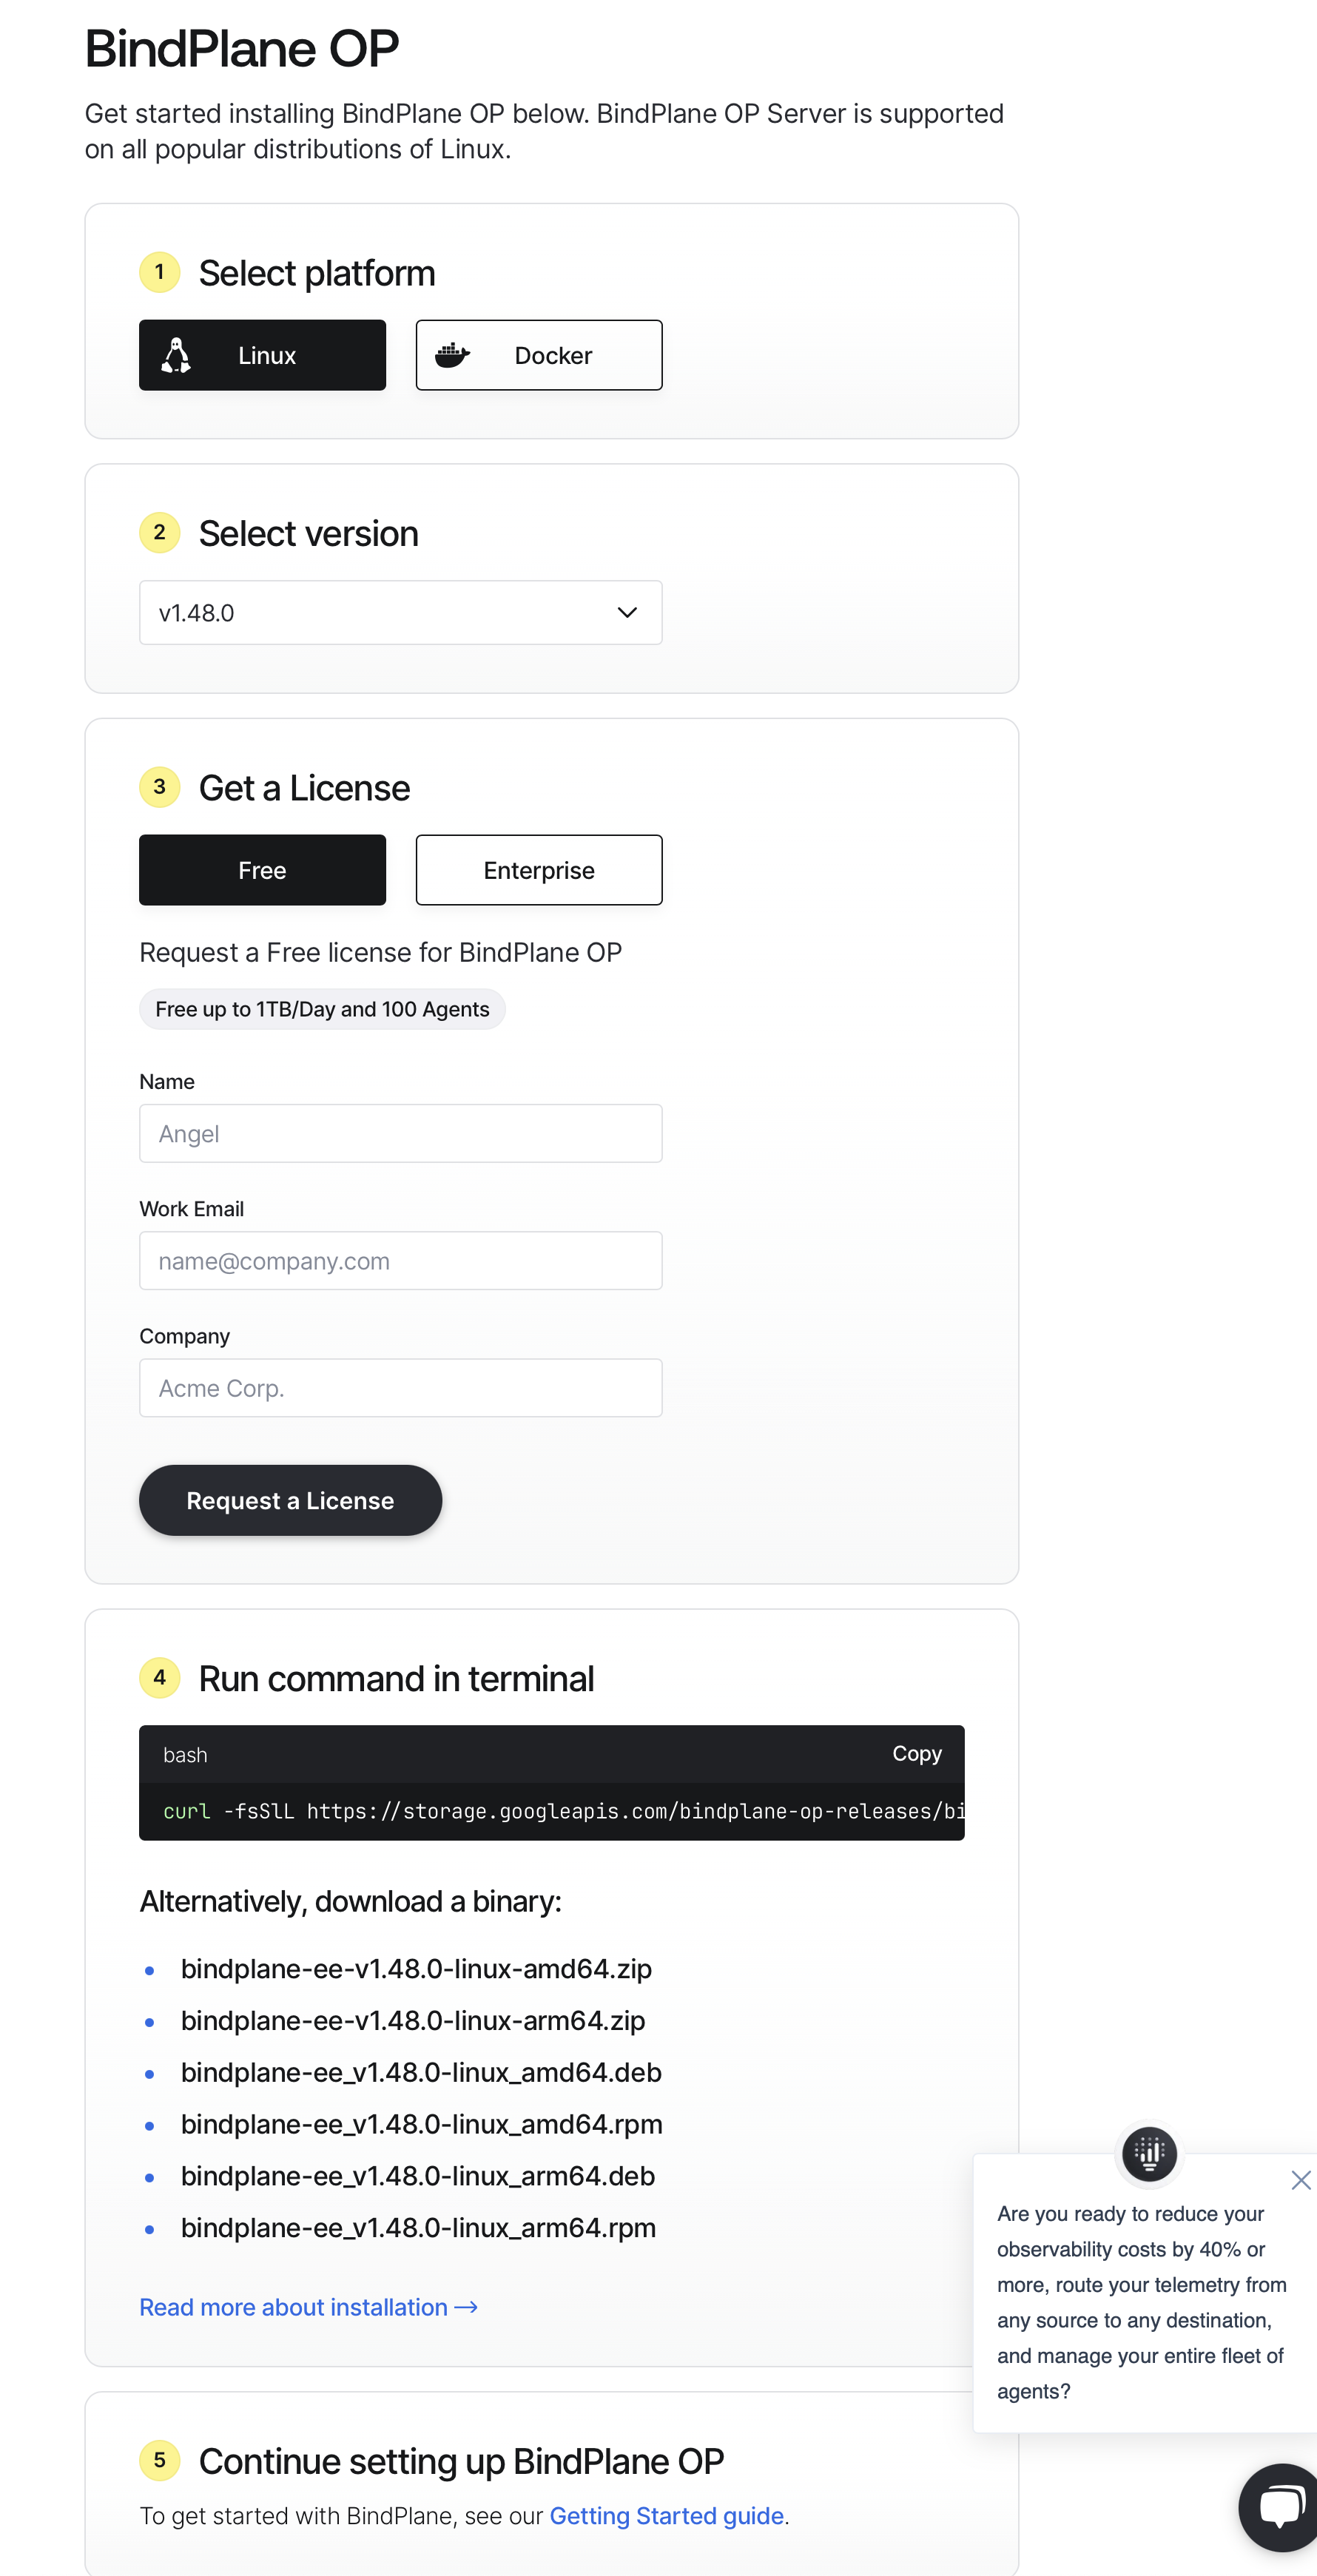
The first step is to download Bindplane OP. The download page has a few steps we need to cover first:
-
The first is to select the platform you will be running it on. You can choose Linux or Docker.
-
The next step will be selecting the version, it is recommended to use the latest available version.
-
If you don't already have a license, you will have the option to generate a free license as well, save this we will need it soon.
-
The next step will be the command you can run in your terminal for installing Bindplane.
- If you use Docker, make the appropriate changes that are mentioned in the instructions below the script. Run the modified script in your terminal. Congratulations, you are done. You can go to the next section Access Bindplane OP UI
- If you are installing it on Linux, the command you will run will look like the example below:
Configuration
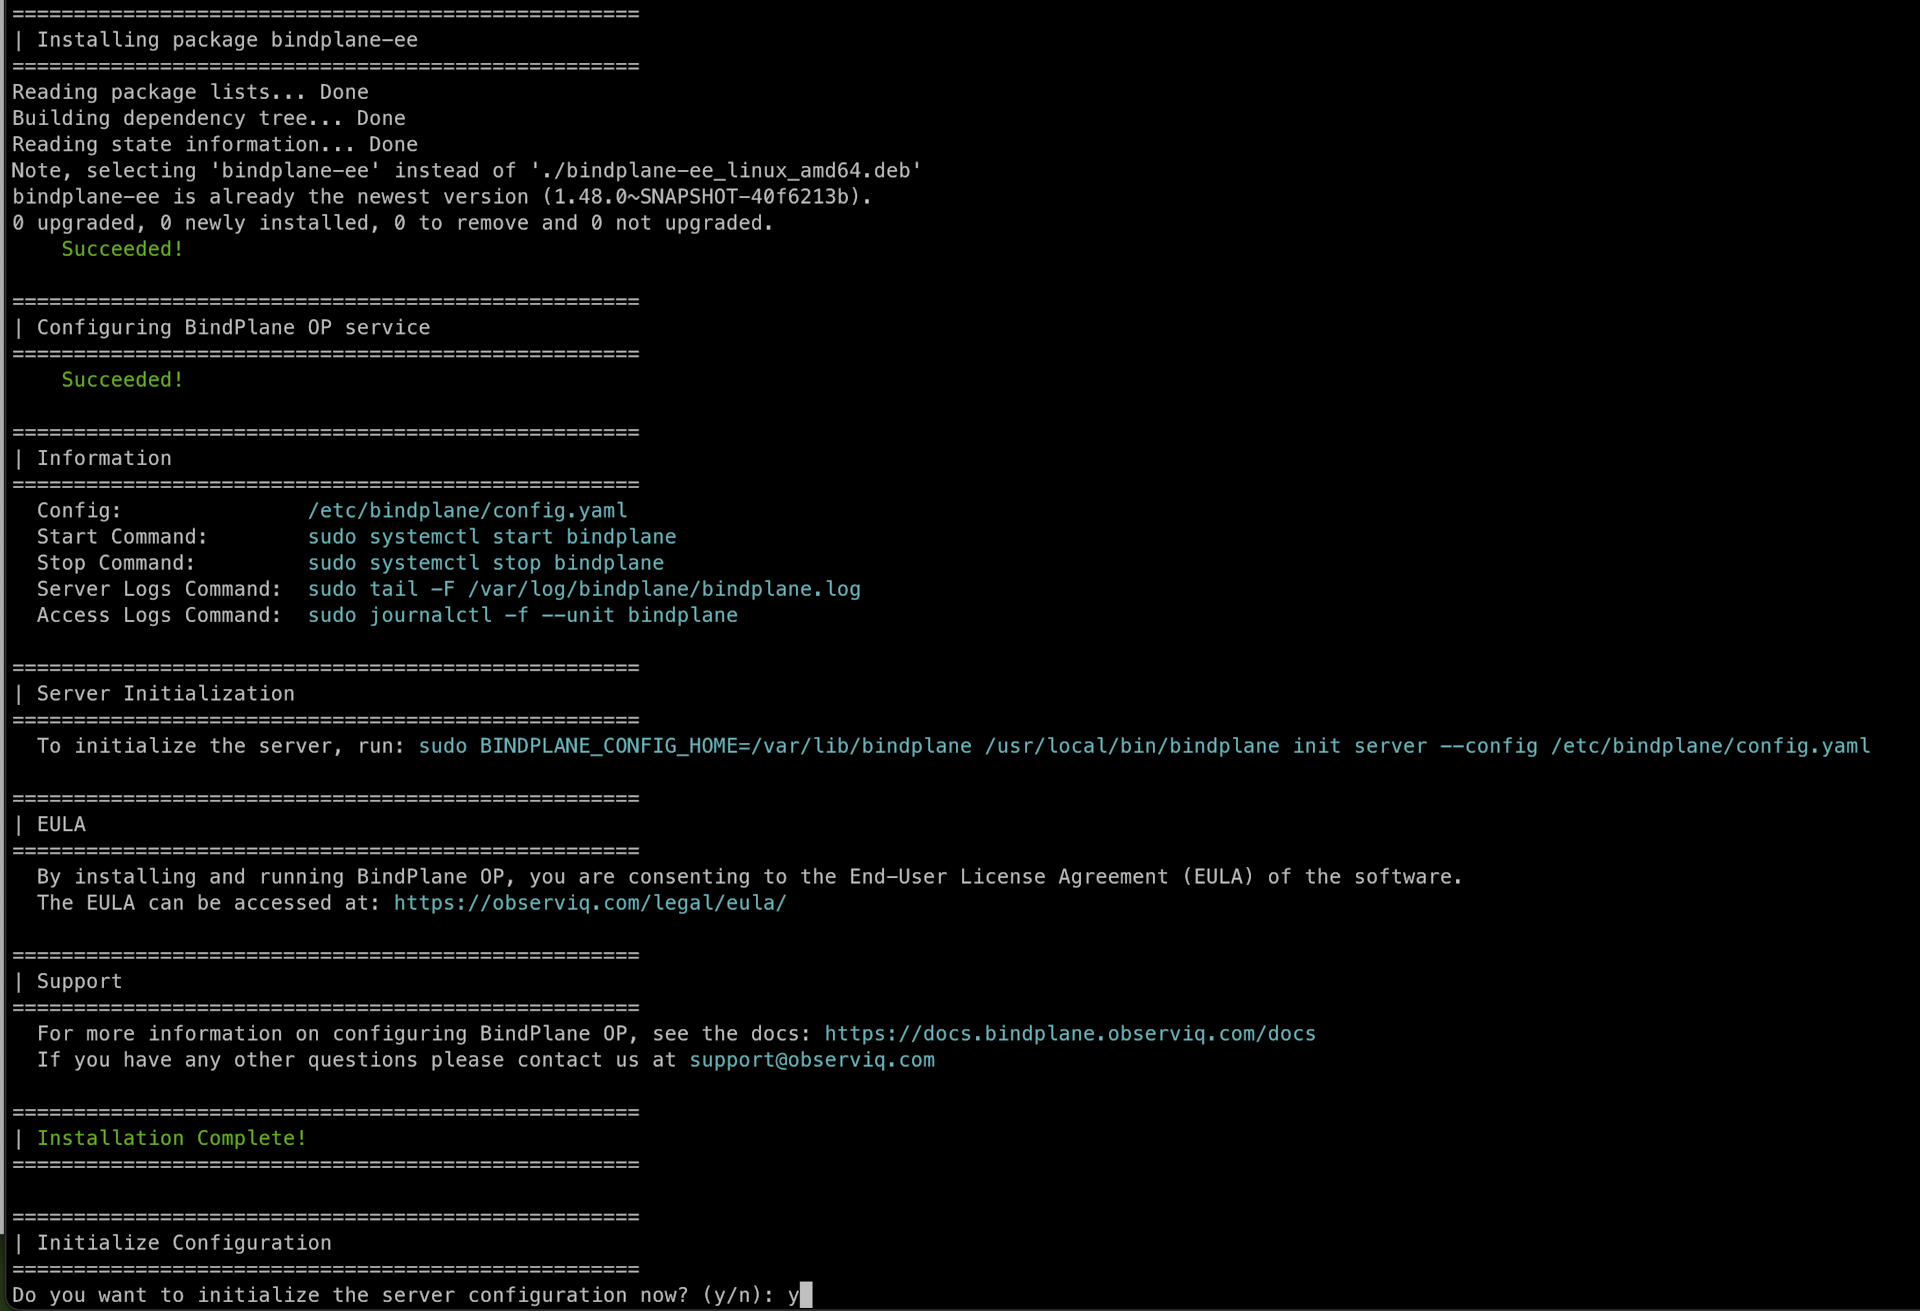
Initialize Server
Type y to continue the installation process. This will initialize the server with some configuration parameters, which updates the fields in the config.yaml located by default at /etc/bindplane/config.yaml:
- License Key: A license is required to initialize the server configuration. If you do not have a license, you can request one on the Download page.
- Server Host: Set to the instance's IP address, or 0.0.0.0 to bind to all IP addresses.
- Server Port: Set to 3001 (the default value) unless you have a reason to change it.
- Remote URL: Set to the URL that should be used to communicate with BindPlane externally. Generally, this is your server's hostname or IP address followed by the port. If BindPlane is behind a load balancer please follow the High Availability instructions.
- Authentication Method: Choose the authentication type you would like to configure. (Free Edition users will not be prompted, instead, basic auth is configured automatically)
- LDAP and Active Directory (Google Edition or Enterprise)
- Enable TLS: If enabled, TLS will be used when communicating with the directory server.
- Enable Mutual TLS: If enabled, mutual TLS authentication will be used when communicating with the directory server.
- TLS Certificate: Path to the X509 PEM TLS certificate to use when mutual TLS is enabled.
- Private Key: Path to the X509 PEM TLS private key to use when mutual TLS is enabled.
- Certificate Authority: Optional path to the X509 PEM TLS certificate authority that should be used to validate the directory server's certificate.
- Insecure Skip Verify: Choose "n" here. It is not recommended to skip certificate verification outside of a development environment.
- Enable Mutual TLS: If enabled, mutual TLS authentication will be used when communicating with the directory server.
- Server Address: Set to the IP address or hostname of the directory server.
- Server Port: Set to the port of the directory server.
- Base DN: Set to the distinguished name that should be used to search for users.
- Search Filter: Set to the search filter that should be used to search for users.
- Bind Username: Set to the username that should be used when authenticating with the directory server.
- Bind Password: Set to the password that should be used when authenticating with the directory server.
- Enable TLS: If enabled, TLS will be used when communicating with the directory server.
- Single User
- Username: Set to your desired basic auth username
- Password: Set to your desired basic auth password
- LDAP and Active Directory (Google Edition or Enterprise)
- Store Type: Choose what storage method BindPlane should use.
- PostgreSQL (Enterprise): Provide connection parameters for the PostgreSQL database to connect to.
- Host: Set to the IP address or hostname of the PostgreSQL instance.
- Port: Set to the port that the PostgreSQL instance is reachable on.
- Database Name: Set to the name of the database to use for storage. BindPlane will create the database at startup if it does not already exist.
- SSL Mode: Set to the preferred SSL Mode for connecting to the PostgreSQL instance.
- Username: Set to the PostgreSQL user to authenticate as.
- Password: Set to the password for the chosen PostgreSQL user.
- BBolt: Use a BBolt database that BindPlane will manage for storage.
note
BBolt is a simple database which is stored on the BindPlane system at
/var/lib/bindplane/storage/bindplane.db
- PostgreSQL (Enterprise): Provide connection parameters for the PostgreSQL database to connect to.
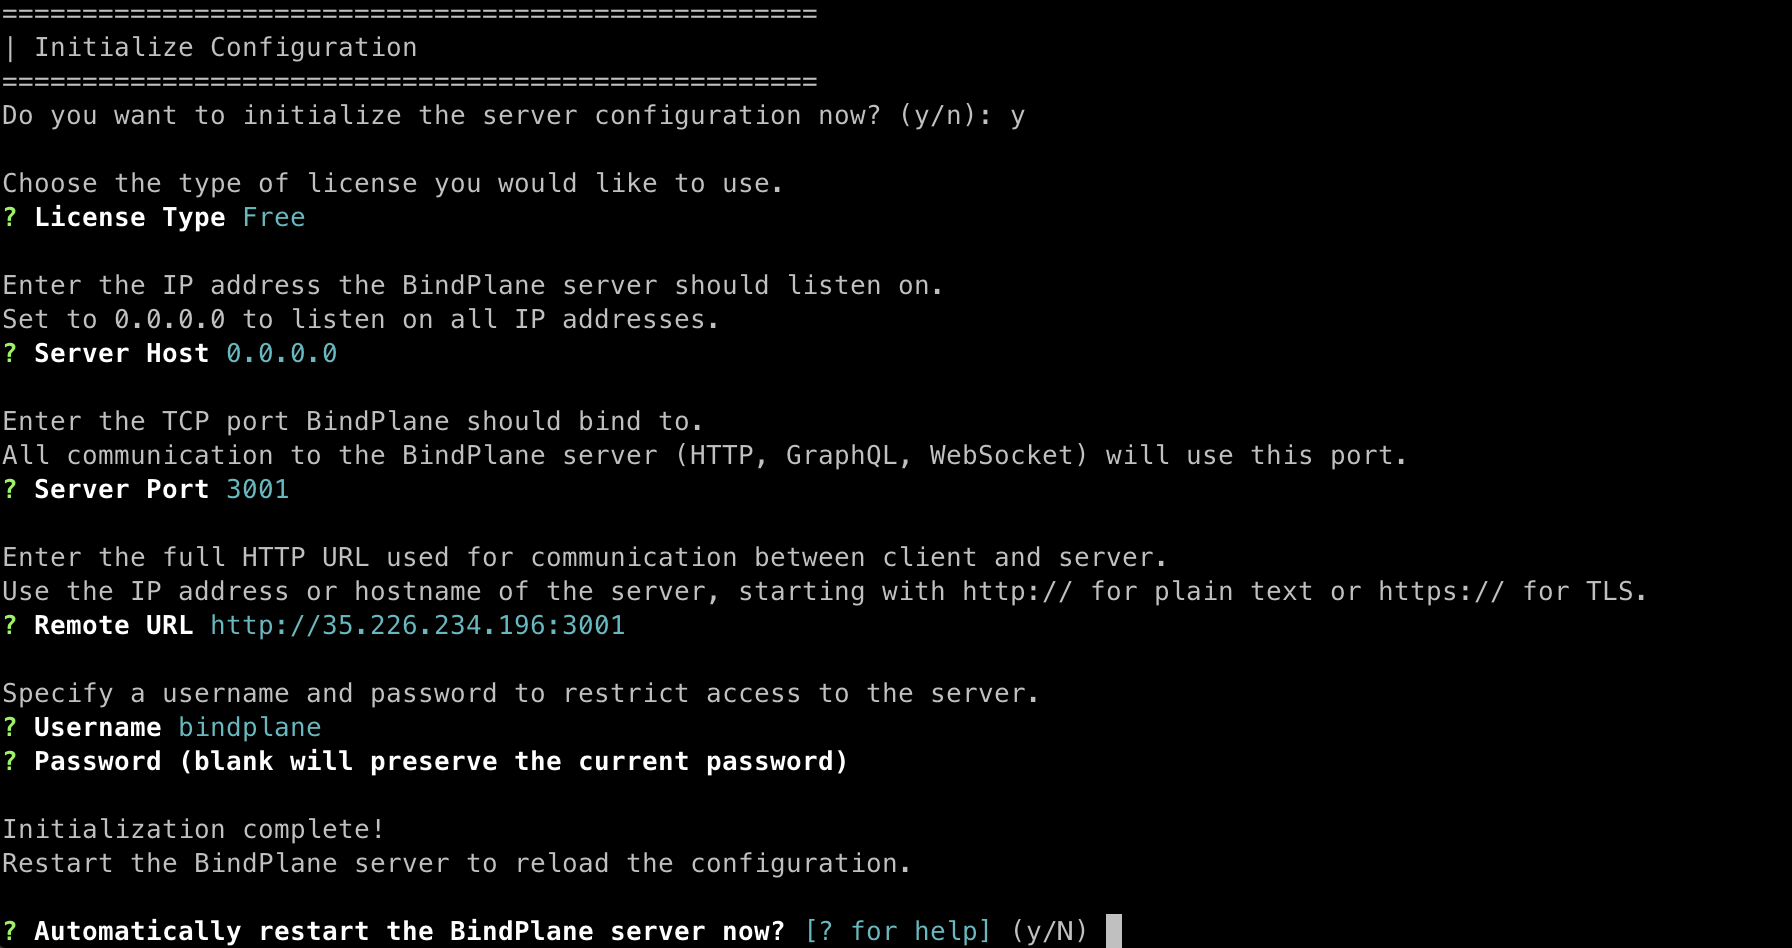
Restart Server
At the end of initialization, you'll be prompted to automatically restart BindPlane to have the changes take effect. If you choose not to restart automatically, use the following command to restart the server manually.
That's it; you've successfully installed BindPlane OP. Next, we'll show you how to access the BindPlane OP UI in your browser.